Create a macOS Menu Bar App with Python (Pomodoro Timer)

On my Mac, I use the menu bar countless times per day. In this post we will go through the process of creating a custom macOS menu bar app using Python. As an example, we will create a 🍅 pomodoro app, which you can use to boost your productivity and manage your time from the convenience of your menu bar. It serves as a starting point for customization to suit your individual needs — you can even use this code as a boilerplate to create a radically different application!
📌 Full post with syntax highlighting on my blog: https://camillovisini.com/create-macos-menu-bar-app-pomodoro/
We will be using the following software:
- Python 3 and PyCharm as an IDE
- Rumps → Ridiculously Uncomplicated macOS Python Statusbar apps
- py2app → For creating standalone macOS apps from Python code (how cool is that?)
Step 1: Set up project directory and install dependencies
In this step we will install all requirements on our local machine. Run the following commands in your terminal to get started and set up the project directory:
export PROJECT_NAME=pomodoro
mkdir ~/PycharmProjects/$PROJECT_NAME
cd ~/PycharmProjects/$PROJECT_NAME
touch pomodoro.py setup.py
Be sure to install both rumps and py2app via pip (on my macOS). Enter the following in your terminal:
pip3 install -U py2app # this will install py2app using pip, or to upgrade to the latest released version of py2app
pip3 install -U rumps # this will install rumps using pip, or to upgrade to the latest released version of rumps
Step 2: Basic example
Open the project directory in your favorite editor or IDE — in my case PyCharm — by typing:
charm .In pomodoro.py we need to set up the following boilerplate code in order to get started:
import rumpsclass PomodoroApp(object):
    def __init__(self):
        self.app = rumps.App("Pomodoro", "🍅")    def run(self):
        self.app.run()if __name__ == '__main__':
    app = PomodoroApp()
    app.run()
If you execute the python program using python3 pomodoro.py, you will notice a new addition to your menu bar – albeit with limited functionality, as you can see…

Step 3: Full implementation
Now we will implement the actual functionality of our pomodoro menu bar app — see the complete code for pomodoro.py below:
import rumpsclass PomodoroApp(object):
def __init__(self):
self.config = {
"app_name": "Pomodoro",
"start": "Start Timer",
"pause": "Pause Timer",
"continue": "Continue Timer",
"stop": "Stop Timer",
"break_message": "Time is up! Take a break :)",
"interval": 1500
}
self.app = rumps.App(self.config["app_name"])
self.timer = rumps.Timer(self.on_tick, 1)
self.interval = self.config["interval"]
self.set_up_menu()
self.start_pause_button = rumps.MenuItem(title=self.config["start"], callback=self.start_timer)
self.stop_button = rumps.MenuItem(title=self.config["stop"], callback=None)
self.app.menu = [self.start_pause_button, self.stop_button] def set_up_menu(self):
self.timer.stop()
self.timer.count = 0
self.app.title = "🍅" def on_tick(self, sender):
time_left = sender.end - sender.count
mins = time_left // 60 if time_left >= 0 else time_left // 60 + 1
secs = time_left % 60 if time_left >= 0 else (-1 * time_left) % 60
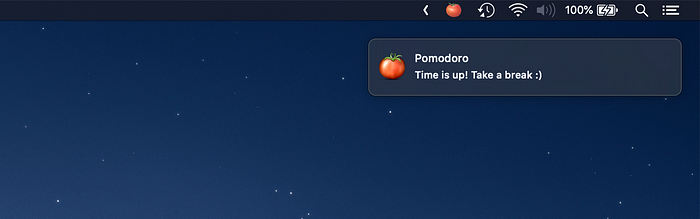
if mins == 0 and time_left < 0:
rumps.notification(title=self.config["app_name"], subtitle=self.config["break_message"], message='')
self.stop_timer()
self.stop_button.set_callback(None)
else:
self.stop_button.set_callback(self.stop_timer)
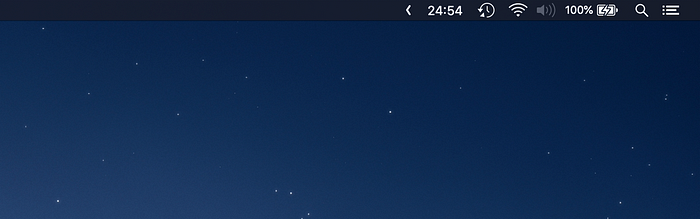
self.app.title = '{:2d}:{:02d}'.format(mins, secs)
sender.count += 1 def start_timer(self, sender):
if sender.title.lower().startswith(("start", "continue")):
if sender.title == self.config["start"]:
self.timer.count = 0
self.timer.end = self.interval
sender.title = self.config["pause"]
self.timer.start()
else:
sender.title = self.config["continue"]
self.timer.stop() def stop_timer(self):
self.set_up_menu()
self.stop_button.set_callback(None)
self.start_pause_button.title = self.config["start"] def run(self):
self.app.run()if __name__ == '__main__':
app = PomodoroApp()
app.run()
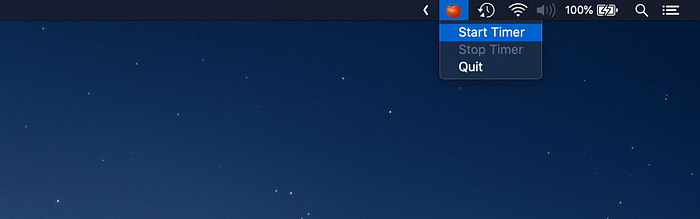
By executing the python program again using python3 pomodoro.py, you can see our menu bar app in its full glory:
In the next step we will go ahead and create a macOS application using py2app so you don’t have to execute it via Python every single time. It needs to be ready for every day use, and that means adding it to the login items of your Mac!
Step 4: Create macOS app from our python code
In setup.py we need to add the following code, which provides all the necessary instructions to create the application bundle (app name, app version, app icon, etc.) to py2app in form of a setup script:
from setuptools import setupAPP = ['pomodoro.py']
DATA_FILES = []
OPTIONS = {
    'argv_emulation': True,
    'iconfile': 'icon.icns',
    'plist': {
        'CFBundleShortVersionString': '0.2.0',
        'LSUIElement': True,
    },
    'packages': ['rumps'],
}setup(
    app=APP,
    name='Pomodoro',
    data_files=DATA_FILES,
    options={'py2app': OPTIONS},
    setup_requires=['py2app'], install_requires=['rumps']
)
Are you missing the icon file? You can download the file I used from the GitHub repository.
Now you can go ahead and create your Pomodoro.app bundle using py2app. Type the following in your terminal:
python3 setup.py py2appThe application bundle will be created in your project directory under /dist/Pomodoro.app.
Conclusion
I’ve implemented a similar menu bar app with some additional functionality. It’s called Timebox. Check it out and let me know what you think!
I hope you enjoyed this article — please let me know if you have any questions or if you run into any issues.
🌱 Let’s stay in touch!
If you’d like to get notified about updates, feel free to follow me on Twitter .
Originally published at https://camillovisini.com.
